


Java Overview:
Java is a class-based, object-oriented programming language designed for write once, run anywhere (WORA). This means that compiled Java code can run on all platforms without recompilation.
History: Developed by James Gosling at Sun Microsystems in 1995, Java has become widely used for desktop, web, and mobile applications.
Features:
Simplicity: Java’s syntax is similar to C/C++, making it accessible for developers.
Robustness: Java emphasizes error handling and memory management.
Security: Built-in security features protect against vulnerabilities.
Portability: Java applications compile to bytecode, which runs on any Java Virtual Machine (JVM).
Object-Oriented: Java encourages modular, reusable code.
Steps in Java Application Development:
Creating the program: Write your Java code using a text editor or an integrated development environment (IDE).
Compiling the program: Use the Java compiler (javac) to convert your source code into bytecode.
Running the program: Execute the bytecode on a JVM.
Installation
Step 1 : Open your browser and search java jdk


Step 3 : Select windows and Downlaod Installer.
Step 4 : After Downloading Open Installer
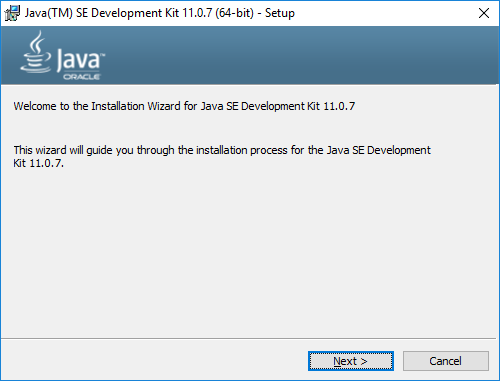
Step 5 : Click on next
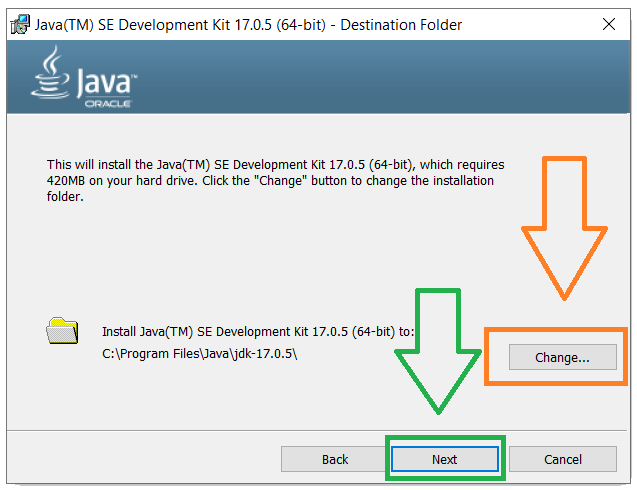
Step 6 : If you want to change installation location then change else it is recommended to remain it same as defaul and click on next
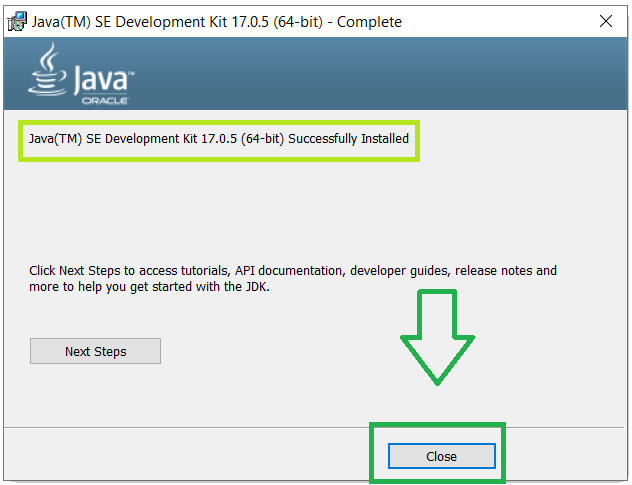
It is all done just closed and now you don't need to work more it is all done and you all installtion is done Enjoy Happy Coding In java.
you don't need to add environment variable seprately .
Summary :
Step 1 : Download the Installer:
Visit the official Oracle Java website.
Click on the “Free Java Download” button.
Accept the license agreement.
Choose the appropriate version (32-bit or 64-bit) based on your system architecture.
Click the download link to save the installer file (usually named jre-8uXXX-windows-x64.exe or similar).
Step 2 : Run the Installer:
Locate the downloaded installer file.
Double-click it to start the installation process.
Follow the on-screen instructions:
Click “Install” or “Next.”
Choose the installation directory (you can leave it as the default).
Wait for the installation to complete.
Click “Finish” when prompted.
Step 3 : Verify the Installation:
Open the Command Prompt (search for “cmd” in the Start menu).
Type java -version and press Enter.
You should see the installed Java version information (e.g., “Java™ SE Runtime Environment”).
That’s it! You now have Java installed on your Windows system.
Thank you have any question you can comment below


0 Comments